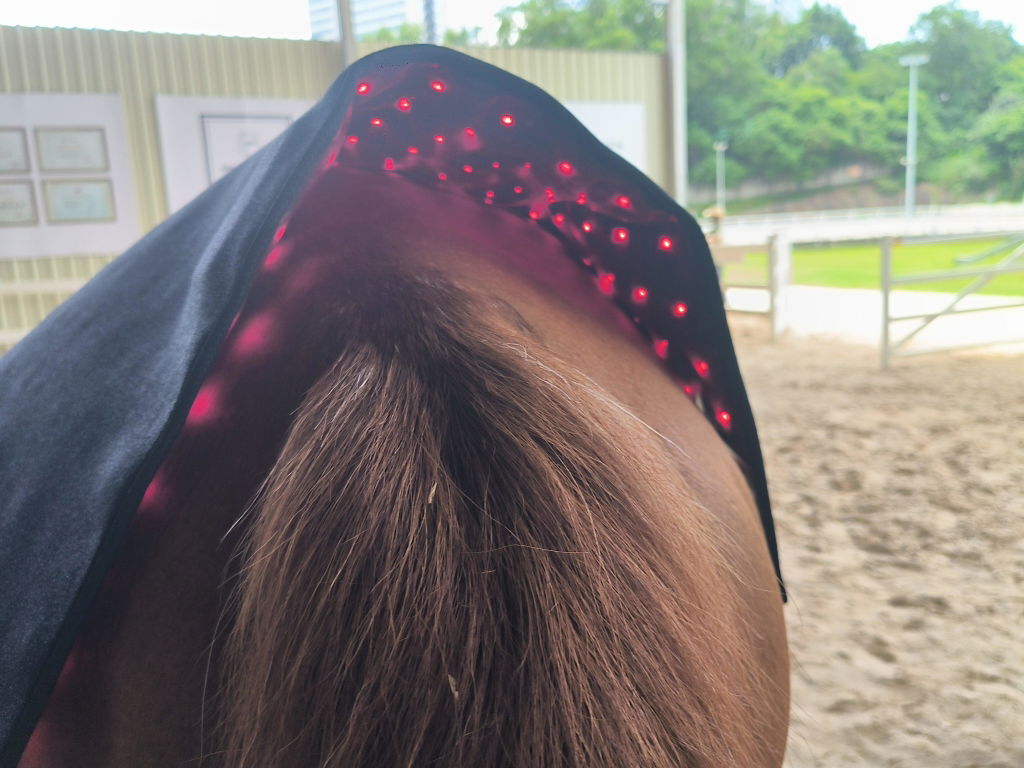
Do You Need to Clean a Horse Before Red Light Therapy? What Actually Matters
Share
It's a simple question with a more interesting answer than you'd expect: should you clean your horse before a red light therapy session?
The short version is yes — but almost certainly not for the reason you're thinking. This isn't about hygiene, or about the device staying clean, or about doing things "properly." It's about physics: red light therapy only works when the light actually reaches the tissue, and a surprising number of everyday things — mud, dried sweat, old ointment, even a wet coat — quietly get in the way and bounce that light back before it can do anything.
So this guide explains what's really happening at the surface of your horse, what genuinely needs cleaning and what doesn't, the one thing almost nobody realises about wet coats, and the single situation where "just clean it" is exactly the wrong instinct. Get this right and every session you run works a little harder for you.
The Short Answer
Yes — clean the specific area you're treating, but keep it simple. Brush off mud, dirt and loose hair, and wipe away any old ointments, liniments or fly spray, so the light meets coat and skin rather than a layer of grime.
What you don't need is a full bath or any elaborate routine. You're not sterilising the horse — you're clearing the path for the light. The whole reason cleaning matters is that anything sitting on the surface scatters and reflects light before it can be absorbed. And one important exception: if the area has an open wound, infection, or hot swollen tissue, that's not a cleaning question — that's a vet question, and it comes first.
Why Cleaning Actually Matters: It's About the Light, Not the Dirt
Anything on the surface bounces light away
Red light therapy works through photons — light particles — reaching the skin and the tissue beneath it, where they're absorbed and drive the therapeutic effect. That absorption is the whole mechanism. Anything forming a layer between the device and the tissue interferes with it.
In human red light therapy, the barriers that get studied are makeup, sunscreen and heavy creams — and the finding is consistent: these create a thin barrier that scatters and reflects light, causing decreased overall absorption and compromised penetration. The photons literally bounce off the surface layer instead of going in.
On a horse, the barriers are different but the physics is identical. Caked mud, dried sweat and sebum, and residue from ointments, liniments or fly sprays all do the same job as makeup does on a person: they sit on top and turn some of your light back.
A useful way to picture it: it's like trying to get a clear signal through a wall. The less obstruction between the device and the tissue, the better the result. Cleaning is simply how you remove the wall.
This reframes the whole question. You're not cleaning to be tidy, or hygienic, or thorough. You're cleaning because a dirty coat is a coat that wastes some of every session — you run the same minutes, hold the device the same way, and simply get less light to the tissue than you paid for in time. Clean the area, and the exact same session delivers more.
What Counts as a "Barrier" on a Horse
Here's what actually gets between your device and the tissue, in rough order of how often it's the culprit:
| Barrier | Where it comes from | What to do |
|---|---|---|
| Caked mud & dirt | Turnout, especially legs and lower body | Brush off until only clean hair remains |
| Dried sweat & salt | After work, under tack areas | Brush or wipe; let a sweaty coat dry first |
| Old topical residue | Ointments, liniments, poultice, creams | Wipe away — these are prime light-blockers |
| Fly spray & oils | Applied earlier that day | Remove from the treatment area; oils reflect light |
| Loose, shedding hair | Seasonal coat changes | Groom out so the device sits on the coat, not fluff |
| Surface moisture | Bath, sweat, rain | Towel and dry — see the next section |
The one that catches people out: old topicals
Owners often reach for red light therapy alongside other care — a liniment after work, an ointment on a sore spot. But oil-based and mineral-containing products are exactly the kind of surface layer that blocks light, the same way physical sunscreens do on human skin. If you've applied something to the area, wipe it off before the session and reapply afterwards if you still want it. Light first onto clean coat, product second.
The Thing Almost Nobody Knows: Wet Coats Block Light Too
Water scatters light the same way dirt does
This one genuinely surprises people, so it's worth stating plainly: a wet surface reflects and scatters light. The human guidance is explicit — a visibly wet surface can increase reflection, and damp skin can stop the therapy working properly because moisture scatters the light. That's why the standard human sequence is always cleanse, pat dry, then treat.
Translate that to a horse and the implications are practical:
Just bathed the area? Towel it and let it dry before you start. Horse come in hot and sweaty? The session works better once the coat has dried off. Wet from rain? Same — dry the treatment area first.
To be clear, a slightly damp coat doesn't make the therapy dangerous — it just makes it weaker, because a dry coat lets more light through. You get more out of the same minutes on a dry surface.
Why this matters more for horses than people
A person doing red light therapy is treating bare, dry skin indoors. A horse is often treated right after work, or after coming in from a wet field, or as part of a cool-down — exactly the moments the coat is most likely to be damp with sweat or rain. The temptation is to treat while you've got the horse standing there. The better habit is to let a sweaty or wet area dry first, then run the session, so the light isn't fighting a film of moisture the whole time.
How to Prepare the Area — Simple Steps
None of this is elaborate. The whole preparation should take a minute or two.
- Identify the exact area you're treating. You only need to prepare where the device will actually sit — not the whole horse. A clean patch over the target is all that matters.
- Brush off mud, dirt and debris until only clean hair remains. A standard grooming brush is fine; you're removing the surface layer, not deep-cleaning.
- Wipe away any old topical products — ointment, liniment, fly spray — from that area. These are prime light-blockers and worth removing every time.
- Groom out loose, shedding hair so the device can sit against the coat rather than a cushion of loose fluff, which also holds an air gap.
- Make sure the area is dry. If it's wet from a wash, sweat or rain, towel it and give it time. Dry coat, better penetration.
- Part or flatten a thick coat where you can, so the device sits closer to the skin and the light travels through less hair.
On products: avoid harsh, medicated or exfoliating cleansers right before a session — the human guidance is clear that these can irritate skin, and irritated skin is the last thing you want under a device. For most sessions, dry mechanical grooming is all you need. If you must wash, keep it gentle and let the area dry fully afterwards.
Clean Coat vs Clipped Coat — Two Different Questions
It's easy to run these together, but "should I clean the coat" and "should I clip the coat" are separate questions with separate answers.
Cleaning — removing mud, sweat, product and moisture — is genuinely worth doing every session, because it removes barriers that block light. Clipping or shaving is a much bigger step, and usually unnecessary. The coat itself isn't the dealbreaker people assume; keeping the device in snug contact and parting a thick coat gets you most of the way, and stripping the horse is rarely worth it.
The short version
Clean: yes, simply, every time. Clip: usually no. If you're wondering whether your horse's coat is too thick and whether the clippers should come out, that's a different decision with its own trade-offs — our guide on whether you need to clip or shave a horse before red light therapy walks through exactly when thinning a thick coat helps and when it isn't worth it.
Do's and Don'ts
Do
- Clean just the treatment area — a clean patch over the target is all you need.
- Remove old ointments and liniments before the session, and reapply after if needed.
- Let a sweaty or wet coat dry before starting.
- Keep the device in snug contact with the clean, dry coat, minimising the air gap.
- Watch the skin throughout and stop if anything looks irritated.
Don't
- Bathe the whole horse just for a session — it's unnecessary, and a wet coat is counterproductive anyway.
- Use harsh or medicated cleansers right before treating — they can irritate the skin.
- Treat over old topical residue — you're just shining light into a barrier.
- Treat a soaking-wet coat — dry it first for better penetration.
- Try to "clean" an open wound and carry on — that's a vet conversation, covered next.
The One Case Where "Just Clean It" Is the Wrong Instinct
Everything above assumes a normal, intact coat over healthy skin. There's one situation where the whole frame changes — and it's important enough to be clear about.
If the area has an open wound, a weeping or infected patch, or hot, swollen tissue — stop. This is not a grooming question, and preparing it with a brush and carrying on is the wrong move.
Three reasons this is different:
- It needs a diagnosis first. A wound or swelling has to be assessed by your vet to establish what it actually is and whether red light therapy is even appropriate for it.
- Cleaning a wound isn't grooming. Cleaning broken or damaged skin is a careful, different process — done wrong, it can introduce contamination or disturb healing tissue. It's not the "brush off the mud" job this article otherwise describes.
- Some conditions look treatable but aren't. Infections in particular are not appropriate for red light therapy and need proper treatment. If you're unsure whether what you're looking at is a job for light at all, that uncertainty is itself the reason to ask your vet.
For any broken, inflamed or uncertain skin surface, the sequence isn't clean-then-treat — it's vet first. Red light therapy is a complementary, supportive measure used within a plan your vet is directing. Our guide to using red light therapy for horse wounds goes into how that fits together — but the entry point is always a professional assessment, not a grooming brush.
Putting It Together: the Two-Minute Routine
For a normal session on healthy skin, the whole thing is quick and worth doing every time:
Before you switch the device on
Brush the target area clean. Wipe off any product. Make sure it's dry. Part a thick coat. Press the device in snug contact. Watch the skin. That's it — a minute or two that makes sure the light you're paying for in time actually reaches the tissue instead of bouncing off a layer of mud, moisture or old ointment.
For deeper guidance on the session itself — timing, positioning, frequency — our step-by-step guide to using red light therapy on horses covers what happens once the area is prepped. And remember the constant that sits under all of it: for any injury, lameness or skin problem, the clean coat comes second to the veterinary diagnosis that should come first.
Conclusion: Clean for the Light, Not for the Look
So — do you need to clean a horse before red light therapy? Yes, but for a reason that changes how you do it. You're not tidying up or being hygienic; you're removing the mud, sweat, old ointment and moisture that scatter and reflect light before it can reach the tissue. A dirty or damp coat doesn't make a session unsafe — it just quietly wastes part of it, so the same minutes deliver less than they should.
The routine is simple: brush the treatment area, wipe off any product, make sure it's dry, part a thick coat, and keep the device in close contact. Two minutes, every time, and the light does more. Keep the two questions separate — cleaning is worth it every session; clipping usually isn't — and know the one exception that overrides all of it: a wound, infection or swelling is a vet call, not a cleaning job.
Prepare the surface well and the honest, supportive role red light therapy can play — within a vet-guided plan — is simply working under the best conditions you can give it. The PbmEquine equine range is designed for exactly that job; a clean, dry coat just lets it do that job properly.
Frequently Asked Questions
Do you need to clean a horse before red light therapy?
Yes, the treatment area should be clean — but the reason isn't hygiene, it's physics. Red light therapy works by light reaching the tissue, and anything sitting on the surface can scatter or reflect those light particles before they get there. Caked mud, dried sweat, and leftover topical products all form a barrier that reduces how much light penetrates, which quietly lowers the effectiveness of the session. So a quick, sensible clean of the specific area you're treating matters — brush off mud, dirt and loose hair, and remove any old ointments or liniments so the light meets coat and skin rather than grime. What you don't need is a full bath or anything elaborate; you're not sterilising the horse, you're clearing the path for the light. And importantly, if the area has an open wound, infection, or hot swollen tissue, that's not a cleaning question at all — that needs your vet first, because red light therapy is a supportive measure and never a substitute for veterinary diagnosis.
Why does dirt reduce red light therapy effectiveness?
Because red light therapy depends on photons — light particles — actually reaching the skin and the tissue beneath it, where they're absorbed and drive the therapeutic effect. Anything forming a layer on the surface interferes with that. In human red light therapy, the barriers studied are things like makeup, sunscreen and heavy creams, which are shown to scatter and reflect light, causing decreased overall absorption and compromised penetration. On a horse, the equivalent barriers are caked mud, dried sweat and sebum, and residue from previously applied ointments, liniments or fly sprays. The principle is identical: a surface layer bounces some of the light away before it can be absorbed, so less reaches the target. Think of it like trying to get a clear signal through a wall — the less obstruction between the device and the tissue, the better the result. Cleaning simply removes that obstruction.
Can I do red light therapy on a wet horse?
Ideally no — dry the coat first, because moisture works against the light in the same way dirt does. This surprises a lot of owners, but surface water scatters light: guidance for human treatment is explicit that a visibly wet surface can increase reflection and that damp skin can stop the therapy working properly, which is why the standard sequence is cleanse, then pat dry, then treat. On a horse the practical implications are that a coat wet from a bath, from sweat after work, or from rain is not the ideal surface for a session. If you've just rinsed the area, towel it and let it dry before you start. If the horse has come in hot and sweaty, a session works better once the coat has dried. It's not that a slightly damp coat makes therapy dangerous — it doesn't — it's that a dry coat lets more light through, so you get more from the same session.
Should I use shampoo or cleaning products before red light therapy?
Usually no — plain mechanical cleaning is enough and gentler is better. For most sessions, brushing off mud, dirt and loose hair and wiping away any old topical residue is all the preparation the area needs; you're clearing surface debris, not deep-cleaning. If you do wash an area, avoid harsh or medicated products right before a session, because they can irritate the skin, and irritated skin is the last thing you want under a device. The human guidance makes the same point — use only gentle cleansing and avoid harsh or exfoliating products before therapy — and it applies just as well to a horse. One specific thing worth removing is any oil-based or mineral-containing product already on the coat, such as certain ointments or fly repellents, since those are exactly the kind of surface layers that block light. When in doubt, less is more: a clean, dry, product-free coat is the goal, achieved as simply as possible.
What if the area I want to treat has a wound or scab?
Stop and involve your vet before treating — this is where 'cleaning' stops being a grooming question and becomes a clinical one. An open wound, a weeping or infected area, or hot, swollen tissue is not something to prepare with a brush and proceed. First, these situations need veterinary assessment to establish what you're actually dealing with and whether red light therapy is even appropriate. Second, cleaning a wound is a different, careful process from grooming a coat, and doing it wrong can introduce contamination or damage healing tissue. Third, some conditions that look like they might benefit from light — infections in particular — are not appropriate for it and need proper treatment instead. As a general rule, if the skin surface is broken, inflamed, or you're unsure, that's a veterinary conversation, not a home session. Red light therapy is a complementary, supportive measure used within a plan your vet is directing — never a first response to a wound.